Pages

Showing posts with label makes. Show all posts

Sunday, January 19, 2014

Teaching Practice: Mini iPad Carrier

My two sons, one 7 and one 5, have now become interested in sewing after watching me giving some sewing lessons last week. My oldest, Connor, has not wanted to really follow through except to request more made to order items and go fabric shopping for his stuff.  My youngest, Aidan, pretty much begged me to teach him about the basics of sewing.

I thought for a while about what project to give him where he would not lose interest and could help at the sewing machine.  My boys both received iPad mini's for Christmas and have the most amazing foam cases that are very protective but also very large.  So I thought an over the shoulder carry case might make traveling with his iPad nicer.

I had some errands to run and we stopped at Hancock Fabrics armed with coupons and Aidan selected all of his own fabrics, a faux fur for the interior and a polar fleece for the exterior.  He also selected some wide polyester webbing in a fantastic rainbow color scheme.  He is a very outgoing child and I honestly could not influence him on his choices.  We actually had a little tisk at the store because he found an organza print he wanted very badly but I had to explain it would be a poor choice for a case and he finally caved in and agreed to look at heavier weight fabrics.  He also selected some happy face buttons to add as trim.

To make the case, we measured the iPad in its case and added 2 inches to width and length to account for the depth of the case and to make it easier for him to insert and remove the iPad.  Using the fold of the fabric as the bottom, I cut a rectangle piece in both fabrics.  The faux fur became the interior lining while the polar fleece became the exterior.

After cutting the pieces, I pinned them right sides together and sat my son at the machine.  Using a half inch seam allowance, I held the fabric and his hands and he pushed the pedal very slowly.  He was so excited that he was actually using the machine!  We had a lot of fun sewing the four straight seams.

After we had two fully sewn pouches, I took over on the sewing and Aidan helped do some pinning.  First, I measured the webbing length and tacked to the right side of the lining.  Since we needed to use his button somehow, I used the last of the webbing as a flip closure.  We worked on attaching the lining to the exterior, I did the sewing on that one.  We flipped it right side out and top stitched the opening all around for extra security.  Aidan helped to hand sew the buttons and the case was complete.

Aidan has been using his new carry case for a week now and it is holding up nicely.  He proudly tells people, whether they wanted to know or not, that it was his design and he helped to make.  It makes me very proud and happy to his face when people complement him on his good work.

Friday, January 3, 2014

A New Take on the Classic Tee

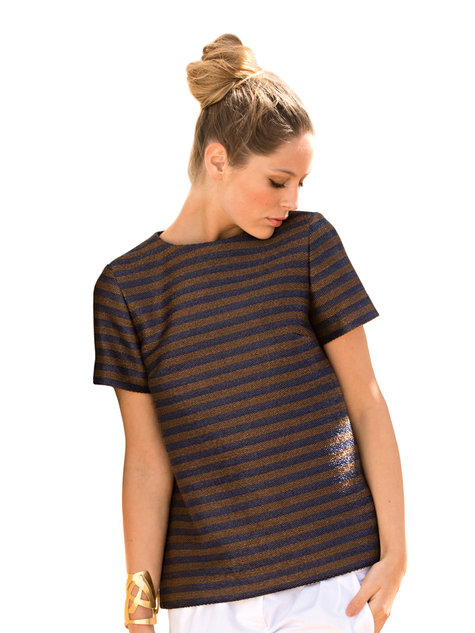
Retro Top 07/2013 #130 from BurdaStyle.com (Pattern)

So in my email pops this update from BurdaStyle featuring this classic retro top.  At first glance, I thought it was pretty boring.  Then I stared at it a while and thought that maybe it might be perfect to make in organza.  Maybe some sparkly trim, black on black.  It would be a fun way to take a close fitting tank and make it just a little cooler and more evening or wear it with jeans.  It would also be a great practice for French Seams on sleeves, something I feel I need to practice more.

Oh, too many projects and not enough time.

Thursday, January 2, 2014

Emergency Project: Cold Weather Waterproof Mittens (Part 1)


Today it is cold and it has snowed a little over an inch in my neck of the woods.  My boys are at home and want to go out and play, so we look in the hat and glove bin and lo and behold we have one of every set of gloves.  Ugh.  I check the forecast and the weather is about to take a turn for the cold, a high of 18 degrees as they get back to school on Monday.  So super mom has to figure out how to keep those little fingertips from freezing off, so here comes another emergency project.

I decided to be smart and google up some tuts out there so I can run by the fabric store tonight and finish them up two sets of gloves by the morning.  I found a few great resources out there.

The first tutorial I found was on Fleece Fun.  The Free Mitten Pattern on Fleece Fun looks very nice and comes with a great video tutorial.  Available for download are the child's size Small, Medium, and Large as well as Women's size Medium and Large and Men's Medium and Large.

Free Mitten Pattern on Fleece Fun (This is not my pattern, it is a link to a cool tutorial). 


I love the fact that these are lined.  In the tutorial, she uses fleece and minky fabric for the lining.  I am thinking that the glove need to be warmer, we are talking temps in the lower teens, and I want them waterproof.  I do love the shape of the gloves and the sizing, so I think I will be using this pattern.

So I did a little more snooping and found another great tutorial at Sew Can Do.  Here you will find this great tutorial for Insulated Snow Mittens.  I love the idea of using the insulation material as an underlining.  She also suggests using laminated polyester for the outside of the glove, making them waterproof.

Insulated Snow Mittens Pattern and Tutorial by Sew Can Do

I am sure I will be combining both of these great tutorials to make my own version of an insulated mitten.  I am also going to adding a key hook to the gloves and a d-ring to each side of my boys' coats since they magically cannot seem to keep from losing their gloves at school.  I would not want all this hard work for nothing.

Keep on the lookout tomorrow for the results and pictures of what I made.

Tuesday, December 31, 2013

Peter Pan Collar for the Gothic Lolita


My little sister has always been a huge fan of Japanese culture and for her Christmas present I offered to make her something special.  She responded with a request that was rather suprising - a lolita outfit.  Now we are not talking a cosplay lolita outfit, but the amazingly girly lolita style.  While my sister does not seem the lolita type, I was more than happy to jump at the opportunity to work in fluffy silhouettes and ruffles and lace.

The main part of her present was a massive circle skirt with pleats, self drafted and designed, that I will be posting about soon.  As a side note are the accessories.  Lolitas love accessories and the more the better.  The first accessory to go into the mail was a peter pan collar with leftover bits of lace and cotton batiste bits from my grandma.

As I have never really had a reason to make a collar like this, I googled around a bit ended up using the wonderful free Peter Pan Collar pattern at Elegant Musings.  There is a spectacular tutorial there and the collar came out very pretty.

I did make a miscalculation on the lace and it was too tight so I had to graft in some additional lace.  Its not my usual level of perfect, but for a costume piece I decided to let it go as I had only small bits of the lace left and leaving the house to go shopping for more lace while it is 9 degrees outside was not an option in my mind.  I sent it off today and cuffs will be the next item on the lolita list.